Why Is My CNC Drill Bit Burning Metal How to Fix It in 2026

Time:2026-10-07 Author:Liam
0%

Why is my cnc drill bit burning the metal? This question usually appears beside a smoking workpiece, a blue drill tip, or a sharp, unpleasant smell. In 2026, CNC drilling still fails for familiar reasons. Excessive spindle speed, insufficient feed, poor coolant delivery, and incorrect tool geometry remain common causes. The metal is not simply “too hard.” The cutting conditions may be creating friction instead of controlled chip removal.

CNC educator John Saunders of NYC CNC often explains the issue this way: “Heat is usually a symptom of poor cutting conditions, not the material itself.” That principle helps guide a safer, more accurate diagnosis. Check the programmed RPM, feed rate, drill diameter, material grade, and coolant direction. Then inspect the flutes. Packed chips, polished margins, or a darkened cutting edge provide useful evidence. A sharp carbide drill can still burn when chips cannot escape the hole.

I have made this mistake myself. I increased spindle speed, expecting a cleaner finish, but produced more heat instead. The better approach is less dramatic. Reduce speed when appropriate, maintain a firm feed, and clear chips between peck cycles. Do not guess blindly. Record the tool, material, coolant, depth, and cycle settings. Small changes can reveal the real cause.

This guide explains how to identify burning, correct drilling parameters, protect the workpiece, and prevent repeated tool damage. Some recommendations may need adjustment. Every machine, material batch, and setup behaves slightly differently.
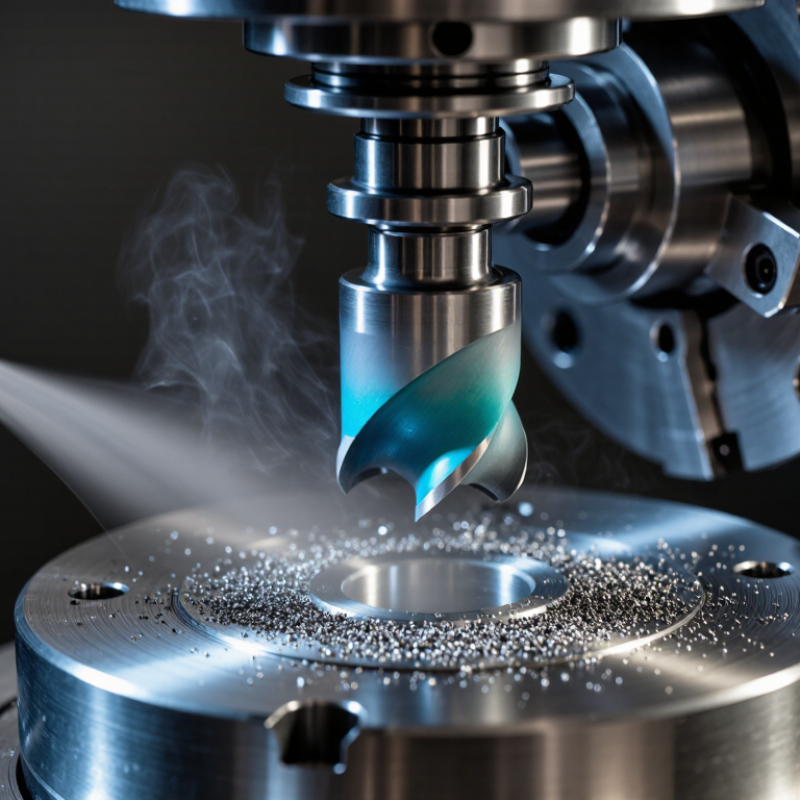
Why Is My CNC Drill Bit Burning Metal How to Fix It in 2026

What It Means When a CNC Drill Bit Burns Metal

When a CNC drill bit burns metal, the hole is showing excessive heat, not simply a dull tool. Blue chips, brown edges, smoke, or a polished hole wall suggest that heat remains in the cutting zone. I have seen this happen when feed was too light. The drill rubbed instead of cutting. Excessive speed, poor chip evacuation, a blunt point, or incorrect coolant delivery can create the same symptom. The Machining Data Handbook places many HSS drilling operations in mild steel near 20–30 m/min, but diameter and material can change that range sharply.

The meaning is practical: the process is losing controlled shearing. Check spindle speed, feed per revolution, tool runout, and coolant direction. A 0.02 mm runout can overload one cutting edge, even when the program appears correct.

ISO 8688-2 uses measured flank wear for drilling tool-life evaluation; 0.3 mm is often treated as a practical wear limit in machining tests. Do not rely only on appearance. Measure the edge under magnification and inspect the hole entrance for chipping. A burned surface may also indicate work hardening, which makes the next pass worse.

Tips:

Reduce speed by 10–20% and increase feed carefully, rather than slowing the feed.

Use pecking when chips pack inside deep holes.

Confirm coolant reaches the tip.

Replace the bit if its margin is discolored, chipped, or visibly rounded.

One correction at a time works better. I still find this easy to overlook.

Record the material, diameter, speed, feed, and hole depth after each trial.

Common Causes of CNC Drill Bit Overheating

A CNC drill bit usually burns metal because heat cannot escape the cutting zone. Excessive spindle speed is a common cause. When the cutting edge moves too quickly, it rubs instead of cutting. The metal may turn blue, smell sharp, or leave dark marks around the hole. A dull or chipped bit creates the same problem. Inspect the edge under good lighting before changing machine settings.

Feed rate matters as well. A feed that is too slow lets the bit polish the material without producing healthy chips. A feed that is too aggressive can overload the edge and create sudden heat. Check the chips. They should leave the hole cleanly, not appear as fine dust or long, glowing strands. Peck drilling can help when the hole is deep, because it gives chips a path out and allows brief cooling.

Coolant may be missing, poorly aimed, or contaminated with chips. However, I have blamed coolant too quickly in some shop checks. Tool runout, loose workholding, and an incorrect bit for the material often mattered more. Keep the bit centered, secure the workpiece firmly, and clear chips before they pack around the flutes. Reduce speed carefully, then adjust feed in small steps. Do not change every setting at once. That makes the real cause harder to identify.

Why Is My CNC Drill Bit Burning Metal? Typical HSS Cutting-Speed Limits

These representative upper-limit cutting speeds show why a CNC drill bit may overheat. Harder, less thermally conductive materials such as stainless steel and titanium require much lower speeds than aluminum. If the spindle speed is above the suitable range, reduce RPM, maintain adequate feed pressure, use suitable coolant, and replace a dull or damaged drill bit.

Reference basis: typical cutting-speed ranges for HSS twist drills at room temperature; exact values depend on drill diameter, coating, machine rigidity, coolant, and workpiece condition.

How to Check Cutting Speed, Feed Rate, and Tool Condition

When a CNC drill bit burns metal, excessive heat usually comes from rubbing instead of cutting. Check the cutting speed before changing anything else. Calculate it with: cutting speed = π × tool diameter × spindle speed ÷ 1,000. Use the work material and tool diameter to select a suitable range. If the hole shows blue or brown discoloration, the spindle speed may be too high.

Feed rate needs equal attention. A feed that is too low can polish the surface, create dust-like chips, and overheat the cutting edge. A feed that is too high may produce thick chips, vibration, or a damaged hole. Watch the chips closely. They should leave the hole consistently, not pack around the flutes. If chips are short and powdery, increase feed slightly or reduce speed, then test on scrap material.

Inspect the tool condition under good lighting. A rounded edge, chipped corner, built-up metal, or uneven coating can cause burning even with correct settings. Stop immediately. Clean the flutes and check runout, tool length, and workholding. I once blamed spindle speed for a burned hole, but the real problem was a loose tool holder. That mistake was expensive and easy to miss. Make one adjustment at a time, record the result, and allow the tool to cool before judging its condition. Rescue attempts with a visibly damaged bit often waste more material.

Why Is My CNC Drill Bit Burning Metal? How to Fix It in 2026 — Checking Cutting Speed, Feed Rate, and Tool Condition
Workpiece Material Recommended Tool Type Starting Cutting Speed
(Vc, m/min)
Starting Feed per Revolution
(f, mm/rev)
Example Drill Diameter Calculated Spindle Speed
(RPM)
Calculated Feed Rate
(mm/min)
Typical Burning or Failure Sign Primary Check Corrective Action
Mild Steel
(approximately 150–200 HB)
High-speed steel or solid carbide twist drill HSS: 20–30
Carbide: 60–100
0.06–0.12 for a 6 mm drill 6 mm HSS: 1,060–1,590
Carbide: 3,180–5,300
HSS: 64–191
Carbide: 191–636
Brown or blue chips, smoke, a shiny hole wall, or a rapidly darkening cutting edge Confirm RPM and whether the drill is rubbing instead of producing continuous chips Reduce speed if heat is excessive, maintain sufficient feed, use coolant, and replace a rounded or chipped drill
Stainless Steel
(austenitic grades)
Sharp solid carbide drill or rigid high-speed steel drill HSS: 8–15
Carbide: 40–70
0.04–0.09 for a 6 mm drill 6 mm HSS: 425–800
Carbide: 2,120–3,710
HSS: 17–72
Carbide: 85–334
Blue edge, work-hardening, squealing, and a drill that stops cutting after dwelling Check for dwell, repeated pecking at the same depth, inadequate coolant, and a dull margin Use a firm feed, avoid dwelling, improve coolant delivery, and use a sharp tool with suitable point geometry
Aluminum Alloys Polished-flute carbide or sharp high-speed steel drill HSS: 60–100
Carbide: 120–250
0.08–0.18 for a 6 mm drill 6 mm HSS: 3,180–5,300
Carbide: 6,370–13,260
HSS: 254–954
Carbide: 510–2,387
Aluminum welds to the flutes, chips pack in the hole, or the tool produces a rough oversized hole Inspect for built-up edge, clogged flutes, insufficient chip evacuation, and unsuitable lubricant Use a sharp polished flute, increase chip evacuation, apply suitable coolant or mist, and prevent chip recutting
Gray Cast Iron Carbide drill or rigid high-speed steel drill HSS: 15–25
Carbide: 50–90
0.05–0.10 for a 6 mm drill 6 mm HSS: 800–1,330
Carbide: 2,650–4,770
HSS: 40–133
Carbide: 133–477
Edge chipping, abrasive wear, dusty chips, or heat concentrated at the drill point Check tool wear, machine rigidity, runout, and whether abrasive chips are being recut Use a rigid setup, remove chips with air or coolant, lower speed if abrasive wear is rapid, and replace chipped carbide
Hardened Steel
(approximately 40–50 HRC)
Carbide drill designed for hardened material 20–45 0.03–0.07 for a 6 mm drill 6 mm 1,060–2,390 32–167 Cutting edge micro-chipping, abnormal vibration, high spindle load, or a hole that becomes undersized Verify hardness, tool grade, runout, rigidity, and whether the tool is entering an interrupted surface Use a rigid carbide setup, reduce radial runout, avoid dwell, and select a tool rated for the actual hardness
Brass and Copper Alloys Sharp high-speed steel or carbide drill with geometry suitable for non-ferrous metal HSS: 40–80
Carbide: 100–200
0.05–0.14 for a 6 mm drill 6 mm HSS: 2,120–4,240
Carbide: 5,300–10,610
HSS: 106–594
Carbide: 265–1,485
Grab-in, chatter, a bell-mouthed hole, or a sharp edge that suddenly breaks Check point angle, rake geometry, workholding, runout, and excessive feed at breakthrough Use a suitable point geometry, secure the workpiece, support the exit, and reduce feed near breakthrough
Titanium Alloys Sharp carbide drill with strong coolant delivery 15–35 0.04–0.08 for a 6 mm drill 6 mm 800–1,860 32–149 Blue or purple edge, chip packing, squealing, or rapid loss of cutting-edge strength Check heat removal, tool overhang, coolant direction, and whether feed is too light Use adequate feed to keep the tool cutting, deliver coolant directly to the point, and avoid long dwell periods
Any Metal Any suitable drill type Based on the tool and workpiece combination Based on drill diameter and manufacturer-independent cutting data Any diameter Use the cutting-speed formula below Use the feed-rate formula below Burning usually indicates excessive heat from high RPM, low feed, poor chip evacuation, rubbing, tool wear, or insufficient coolant Inspect tool color, cutting edges, flutes, runout, workholding, coolant flow, and actual machine settings Stop the cycle, allow the tool to cool, correct speed and feed, clear chips, improve coolant delivery, and replace a damaged tool
Calculation formulas: Spindle Speed (RPM) = (Cutting Speed Vc × 1,000) ÷ (π × Drill Diameter in mm). Feed Rate (mm/min) = RPM × Feed per Revolution. Example: For a 6 mm carbide drill in mild steel at 80 m/min and 0.08 mm/rev: RPM ≈ 4,240 and feed rate ≈ 339 mm/min.
Practical starting-point note: The ranges above are starting values rather than universal limits. Adjust them for drill diameter, flute length, tool material, coating, machine rigidity, hole depth, workpiece hardness, coolant method, and the type of hole entry or breakthrough. A properly cutting drill should produce controlled chips; rubbing, prolonged dwell, and chip recutting are common causes of burning.

Step-by-Step Fixes for Cleaner, Cooler CNC Drilling

Why Is My CNC Drill Bit Burning Metal? How to Fix It in 2026

A glowing drill tip usually signals excessive heat, poor chip removal, or a worn cutting edge. I have seen this happen even when the programmed settings looked reasonable. Stop the cycle and inspect the bit, workpiece, and chips before changing everything at once. A blue, darkened edge is often heat damage, not normal wear.

Replace a dull bit first. Confirm its diameter and flute condition under bright light. Then reduce spindle speed if the material feels hot, and increase feed slightly when chips are powdery. Tiny chips can mean rubbing instead of cutting. Use a suitable cutting fluid or steady coolant stream, directed into the hole. Keep the nozzle close, but away from rotating parts.

Check chip evacuation with a shallow peck cycle, especially in deep holes. Retract often enough to clear packed chips. I once blamed coolant flow, but the real problem was an incorrect hole depth setting. That mistake cost a tool and a workpiece. Verify the tool’s runout, clamping pressure, and alignment as well. Even a small wobble can create heat on one side of the hole.

Test the correction on scrap material. Measure the hole, inspect its wall, and touch the tool only after it cools. Do not chase a perfect finish by increasing speed blindly. Material hardness, drill geometry, and machine rigidity all change the result. Record each adjustment, because memory is unreliable in a noisy shop.

How to Prevent Drill Bit Burning in Future CNC Jobs

Why Is My CNC Drill Bit Burning Metal? How to Fix It in 2026

Preventing a burning drill bit starts with controlling heat, friction, and chip removal. Use the correct cutting speed and feed rate for the material. Excessive speed often creates blue chips, smoke, and a sharp burnt smell. A feed rate that is too slow can rub instead of cut. Keep the bit properly sharpened. A dull edge generates heat quickly, especially in stainless steel or hardened alloys. Check the tool’s diameter, flute design, and recommended cutting range before each CNC job.

Tips: Apply steady coolant directly to the cutting zone. Clear chips between peck cycles. Secure the workpiece firmly. Inspect the bit after every batch. If the hole turns dark or rough, stop immediately and check the settings.

Tool alignment also matters. Even a small runout can make one cutting edge work harder than the others. Measure the tool holder and inspect the spindle for dirt or damage.

I once blamed coolant flow for burning, but the real problem was a worn holder. That mistake cost several parts.

Now, I record material type, hole depth, speed, feed, and coolant condition after each job. This creates useful evidence for future adjustments. Do not copy settings blindly. Machines, materials, and tool conditions vary. Make small changes, then watch chip shape, sound, and surface color. Silent confidence can be misleading.屙

FAQS

What does a burned CNC drill hole usually indicate?

It usually indicates excessive heat in the cutting zone. Blue chips, smoke, brown edges, or polished walls are warning signs.

Why can a slow feed rate burn the metal?

A very slow feed may rub instead of cut. The drill polishes the surface and creates friction.

Can excessive spindle speed cause burning?

Yes. Excessive speed can overheat the cutting edge, especially in stainless steel or hardened materials. Reduce speed carefully.

What should healthy drilling chips look like?

Healthy chips should leave the hole cleanly. Fine dust, glowing strands, or packed chips suggest poor cutting conditions.

How can peck drilling reduce overheating?

Peck cycles help remove chips from deep holes. They also provide short cooling periods. Keep the withdrawal distance practical.

Could coolant be the real problem?

It could be missing, contaminated, or poorly aimed. However, I have blamed coolant too quickly before.

How does tool runout contribute to burning?

Runout makes one cutting edge work harder. Even 0.02 millimeters can overload an edge and increase heat.

When should the drill bit be replaced?

Replace it when the margin is discolored, chipped, rounded, or visibly worn. Inspect the edge under magnification.

What adjustments should be tested first?

Reduce speed by 10–20 percent and increase feed carefully. Change one setting at a time.

How can future jobs be documented better?

Record material, diameter, hole depth, speed, feed, and coolant condition. Small notes can expose patterns later. Silent confidence misleads.

Conclusion

If you are wondering, “why is my cnc drill bit burning the metal,” the problem usually points to excessive heat at the cutting zone. This can result from an incorrect cutting speed, feed rate that is too slow or too aggressive, a dull or damaged drill, poor chip removal, insufficient coolant, or a workpiece that is not securely held. Burning marks, discoloration, smoke, unusual noise, and rough or oversized holes are common warning signs. Inspect the tool condition, verify spindle speed and feed settings, and check that the drill is properly aligned before continuing.

To achieve cleaner, cooler CNC drilling, replace or sharpen worn tooling, reduce cutting speed when necessary, and adjust the feed rate to maintain consistent chip formation. Use suitable coolant or cutting fluid, clear chips frequently, and ensure the material is firmly supported. Prevent future overheating by selecting the correct drill geometry, testing settings on scrap material, maintaining reliable coolant flow, and inspecting tools between jobs. Consistent monitoring helps extend tool life, improve hole quality, and reduce production delays.

Liam

Liam

Liam is a dedicated marketing professional with a profound expertise in the industry, where he excels at highlighting the unique advantages of our core products. With a keen understanding of market trends and consumer needs, Liam frequently updates our company’s professional blog, providing......