A drill bit that slides across a smooth surface can turn a simple hole into a crooked one. You press the trigger, the tip skates, and the mark shifts before the bit begins cutting. If you are asking, “why is my drill bit wandering before entering the material,” the cause is often a mix of surface, bit, and setup—not necessarily a faulty drill.
Smooth metal, glazed tile, rounded stock, and hard wood can give the tip little to grip. A dull or unsuitable bit may skate longer, while excessive pressure can make control worse. The drill’s angle matters, too. Even a small tilt can send the cutting edge off course. It is easy to blame the tool. Sometimes the layout mark is simply hard to see.
A few practical checks help narrow it down. Confirm that the bit is sharp and suited to the material, then hold the drill square to the surface. For many jobs, a center punch creates a small starting dimple in metal; a pilot hole can also guide a larger bit. On fragile materials, follow the maker’s guidance, since a punch or the wrong bit may cause chips or cracks. Slow speed and steady pressure usually provide better control than a forceful start. Small adjustments matter. This is not always a one-step fix: coated surfaces and irregular stock may still need a careful approach. The sections ahead explain common causes and ways to improve the first contact, so you can make a cleaner start without forcing the drill.
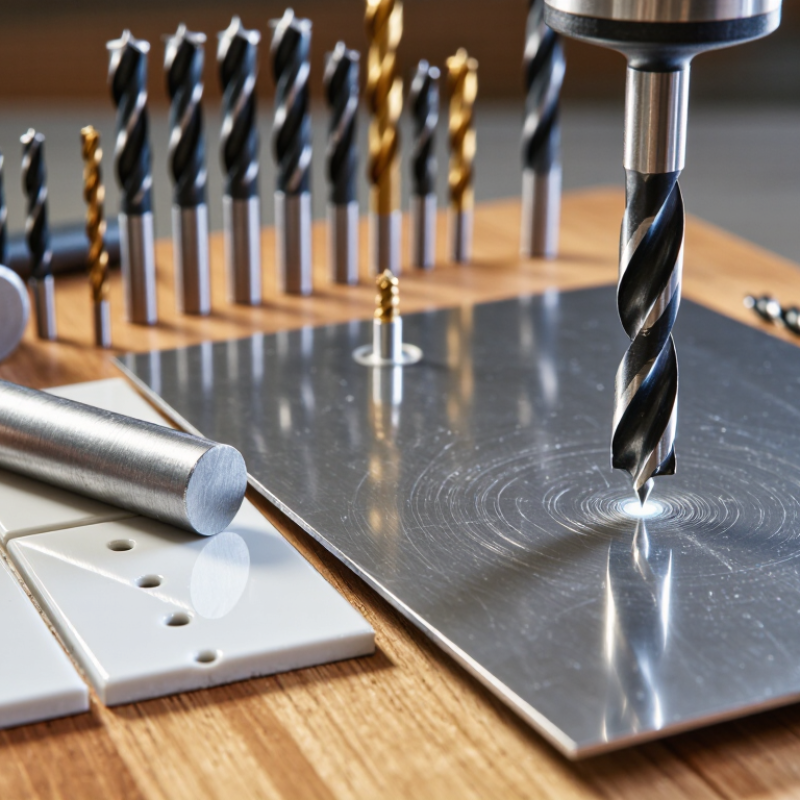
Drill bit wandering is the sideways movement that happens when a bit slides across a surface instead of starting at the intended point. You may see the tip skate, leave a short curved scratch, or begin a hole a few millimeters off target. It often occurs before the cutting edges have formed a stable opening. A smooth metal plate, glazed tile, or varnished board can make this more noticeable.
It usually happens at the start of drilling, when the bit first meets the material. Hard, smooth surfaces offer little grip, while angled or rounded surfaces can push the tip away from the marked spot. A dull or unsuitable bit may wander more because it struggles to bite cleanly. Pressure can matter, too. Pressing harder is not always the fix; excessive force may make the tool harder to control.
The effect varies with the material and setup. A small pilot mark, a correctly selected bit, and a drill held square to the surface can help the tip stay on course. On metal, a center punch can create a small starting dent. On wood, a sharp brad-point bit may start more accurately than a general-purpose bit. Still, a mark can shift as the workpiece moves. I’ve found that checking the clamp and the angle again is easy to overlook.
A drill bit can drift before its tip bites into the workpiece, especially on smooth or curved surfaces. A polished steel panel, for example, gives the cutting edge little grip. The bit may skate sideways as the drill starts. This is not always a sign of a damaged tool; the surface and setup often matter more.
A dull or unevenly sharpened bit can wander because its cutting edges do not engage the material evenly. Excessive pressure can make the problem worse. The bit bends slightly, then slips instead of cutting cleanly. Starting at high speed may also let the tip skate across metal or hard plastic. On wood, angled grain or a knot can nudge the bit off course. Small defects are easy to miss.
Poor alignment is another common cause. If the drill is tilted, the bit can walk away from the marked point before it forms a stable hole. A loose chuck, worn bit, or unsecured workpiece adds movement. Check that the bit is straight and firmly clamped, and hold the material steady. A center punch on metal or a shallow pilot hole in wood can help locate the tip. Still, I sometimes blame the bit too quickly; the surface may be the real culprit.
| Common cause | Why the bit wanders | Typical clues | Practical correction |
|---|---|---|---|
| No center mark or an unclear mark | The bit has no precise starting point, so its cutting edges can slide across a smooth surface. | The pilot hole begins beside the intended location, especially on smooth metal or finished wood. | Mark the center clearly. On metal, make a small indentation with a center punch; on wood, use an awl or a small pilot hole where appropriate. |
| Dull or damaged cutting edges | A worn or uneven cutting edge bites inconsistently, allowing the bit to skid instead of cutting evenly. | The bit squeals, rubs, produces excessive heat, or leaves an uneven opening. | Inspect the tip and replace or correctly sharpen the bit. Use a bit suited to the material. |
| Starting at an angle | A tilted bit applies sideways force as it touches the surface, pushing the tip away from the marked point. | The hole starts off-center or the bit visibly leans during initial contact. | Align the bit perpendicular to the surface, using a drill guide or square as a visual reference when needed. |
| Excessive starting speed or pressure | High speed can make the tip skate before it establishes a cutting path; heavy pressure can worsen a poor start. | The bit jumps at startup or leaves scratches around the intended hole. | Begin at a controlled, low speed with light pressure. Increase speed and feed gradually once the bit is cutting steadily. |
| Incorrect bit type for the material | A tip designed for another material may not engage the surface effectively or may lack a suitable centering feature. | The bit slides on tile, metal, plastic, or hardwood despite careful alignment. | Choose a bit designed for the material, such as a masonry bit for masonry or a suitable metal-cutting bit for metal. |
| Loose or poorly seated bit | A bit that is not clamped securely can wobble, making its true starting point unpredictable. | The bit visibly runs out, shifts in the chuck, or produces an oversized or irregular hole. | Stop the drill, reseat the bit straight in the chuck, and tighten it securely. Check the bit and chuck for damage. |
| Workpiece movement or poor support | Movement at first contact changes the position of the surface relative to the bit. | The material shifts, vibrates, or lifts as drilling begins. | Clamp the workpiece securely and support it close to the drilling point. Keep hands clear of the bit. |
| Curved, angled, or uneven surface | The bit contacts the surface at a small or sloped area, which can deflect the tip before it forms a hole. | The bit slides sideways on a pipe, rounded part, bevel, or uneven board. | Use a center punch where suitable, a drill guide, or a properly shaped starter recess. Secure the workpiece before drilling. |
| Large bit used without a starter hole | A wide cutting edge can be harder to center on initial contact than a small pilot bit. | A large bit shifts around the mark before cutting or makes a ragged entry. | Start with a smaller pilot hole when appropriate, then enlarge it with the final bit. Follow the bit and material guidance. |
Why Is My Drill Bit Wandering Before Entering the Material?
A wandering drill bit often reflects the workpiece, not the bit itself. I have seen accurate bits drift across oily steel, painted surfaces, and rough timber. Surface condition changes the contact between the point and the material. Clean the area and remove loose coatings before marking the hole. A sharp center punch can create a small starting seat. Keep it shallow. A deep punch mark may distort thin sheet metal.
Workpiece support matters just as much. A board that flexes under hand pressure can move when drilling begins. Clamp the material against a firm, flat backing surface. Check for gaps beneath it. Even a small gap can tilt the workpiece and redirect the bit. On round stock, use a V-block or another stable cradle. Do not rely on your grip. It feels secure, but it rarely is.
The drill setup also controls accuracy. Hold the tool square to the surface in both directions. A simple guide block can help when freehand alignment is uncertain. Start at low speed with light pressure, then increase pressure after the cutting edges engage. Excessive force can push the tip sideways. I once tightened a clamp too quickly and slightly bent a thin panel. The hole looked acceptable, but its exit point was wrong. That mistake reminded me to check support, alignment, and material thickness before drilling. A pilot hole may help, though it can wander too if the setup is unstable.
A wandering bit usually starts with a small problem: a rounded surface, a dull point, or pressure applied before the cutting edges bite. Mark the center with a sharp punch, then check the mark from directly above. On smooth metal, a shallow punch dimple gives the tip somewhere to sit. For wood, a small pilot hole can guide a larger bit. Keep the drill square to the surface; even a slight tilt can pull the bit off line. Steady hands help.
Use a sharp bit suited to the material, and begin slowly with light pressure. Let the cutting edges form a ring before increasing speed or feed. On a curved pipe or slick sheet, clamp the work securely and use a guide block or drill guide. Never hold small stock in your hand. The U.S. Bureau of Labor Statistics reported 2.6 million nonfatal workplace injury and illness cases in private industry for 2023; that figure is not specific to drilling, but it reinforces the value of controlled setups. Stop if the bit chatters or the pilot mark disappears. I still sometimes rush this step. That is usually when accuracy slips.
Common twist-drill point angles. A split-point tip helps the bit start more accurately, while a center punch or pilot hole can further reduce wandering.
118° is a common general-purpose point angle; 135° split-point drills are commonly designed to self-center and reduce walking. For better accuracy, mark the location, center-punch it, and start at low speed with light pressure.
Why Is My Drill Bit Wandering Before Entering the Material?
How to Diagnose and Correct Wandering during Drilling
A bit that skates across a surface often signals poor alignment, a rounded point, or excessive spindle runout. Start with the basics. Secure the workpiece, check that the bit sits straight in the chuck, and inspect its cutting edges under a bright light. ISO 230-7 describes methods for measuring machine-tool spindle error motion; its relevance is practical: even small motion at the spindle can shift the bit before it bites. As a workshop check, mark the bit near the chuck and rotate it by hand. Visible wobble deserves attention.
On smooth metal, make a shallow center-punch mark, then drill a small pilot hole before using the final diameter. On wood, a brad-point bit or a simple guide block can keep the tip from skating. Keep the drill perpendicular; a side-loaded bit can wander and enlarge the entry. Use moderate pressure. Too little may let the tip rub, while too much can bend a slender bit. I have also seen careful setups fail because the workpiece moved a few millimeters under the clamp. That is easy to miss. If the hole still drifts, test with a fresh bit and check chuck jaws, spindle play, and the marked entry point.
The tip slides sideways before cutting. It may leave a curved scratch or start a few millimeters off the mark.
It often happens at the start, before the cutting edges form a stable opening. Smooth metal, glazed tile, and varnished wood can offer little grip.
Not always. Too much pressure can make the drill harder to control and push the tip off course. Start lightly.
Make a shallow dent with a center punch. Keep it shallow, especially on thin sheet metal, which can distort.
Use a sharp bit suited to wood. A small pilot hole or brad-point bit can help guide the larger bit.
Clamp it against a firm, flat backing surface and check for gaps. Use a stable cradle for round stock. Don’t rely on your grip.
Hold it square to the surface in both directions. A guide block can help if freehand alignment feels uncertain.
Stop and check the bit, clamp, angle, and material support. I still sometimes rush this check, and accuracy can suffer.
Drill bit wandering occurs when the bit shifts across the surface before its tip bites into the material, leaving a hole that starts off target. If you’re asking, “why is my drill bit wandering before entering the material,” common causes include a dull or unsuitable bit, excessive starting speed, too much pressure, and a smooth or angled surface. Accuracy can also be affected by a workpiece that moves, inadequate support beneath it, or a drill held at an angle.
To keep the bit on target, mark the center clearly, secure the workpiece, and begin slowly with light pressure while holding the drill square to the surface. A small pilot hole, center punch, or guide can help the tip engage more reliably, especially on hard or slick materials. If the bit still drifts, stop and check its sharpness, alignment, speed, and the stability of the setup. Correcting the cause before continuing helps produce a straighter, cleaner hole.

Tier Tool